Another bonus of these curtains is they also have a built in tape at the top which allows you to make the pleats with curtain hooks (which is a much nice look than the simple rod pockets that most curtains come with).
So I hung the curtains and tried to ignore the fact that some puddled on the floor while others were 3 inches above it! They're also kind of flimsy so they didn't drape that nicely either. A chance purchase of a huge quilt on sale for only $70 from Sundance Catalog set the wheels in motion for a bit of customization to said curtains.
The first thing I did was decide how much of the patchwork quilt I wanted to attach to the bottom of each curtain. I chose to use the bottom of the glass pane in the window to be my guide.
I then measured the desired height and used painters tape because I didn't have any chalk or a ruler long enough.
I though about leaving it as is with just the quilt, but decided that it didn't look finished.
So then came the task of deciding what type of piping or detail to use.
I really liked the green geometric fabric, but it only came in 45 inch width. I would either have to turn it around so that the pattern was not the diamond shape that I liked (see below), or I'd have to join 2 pieces together which would create a seam.
Once I had decided on the trim I dusted off the old sewing machine and got to work.
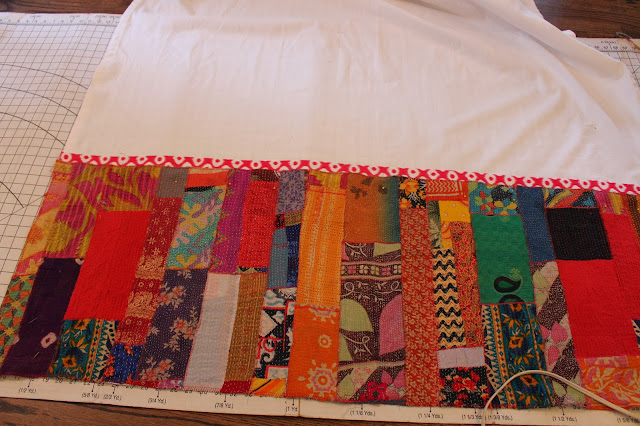
Fortunately the quilt, which incidentally is made from saris, is sewn together quite roughly so my bad sewing skills can be disguised. I simply sewed the patchwork onto curtain making sure that the finished length of the curtain was the desired length (skimming the floor).
I then cut out the trim piece, folded it in half and ironed it.
The final step was to sew all the layers together using a straight stitch.
The trim is only sewn down one side so it is like a flap.
I feel a bit guilty chopping up the quilt because it states on the Sundance Catalog website that each quilt takes 6 months to make! But I think that the curtains came out beautifully.
Here's a break down of the cost of the curtains (per panel).
Curtain Ikea $17.49
Quilt (divided by 6) $11
Trim $1
Grand Total of $29.49.
And I still have quite a bit of the quilt left that I can either make a small throw blanket or a couple of pillows.


Oh that looks so cool! Love it!! Really like the trim accent as well, it just pulls the whole thing so nicely together :) xxx
ReplyDeleteYou did a great job. It came out beautifully.
ReplyDelete