I bought this sofa from Rachel Ashwell's Shabby Chic Studio line a few years ago. I love the shape of it, but it's always looked rather bland. It came slipcovered in an off-white denim. To be quite frank it's definitely more shabby than chic. The slipcover, although very handy to slip-off and clean, needed to be constantly tucked in in the back.
I remember seeing this sofa on a blog and loved the blue chevron material. It's a fun and stylish take on a classic loveseat shape.
 |
| from Alorahandmade |
 |
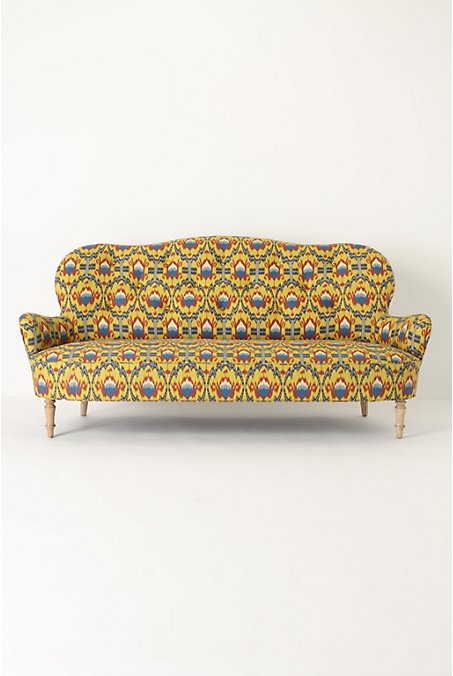
| from Furbish Studio |
I'd bought the chevron fabric for another project months ago. But after coming across these pictures again, thought it would look great on the loveseat. I debated about whether to make a slipcover or upholster. I've made slipcovers before, and although they are time consuming, they're relatively easy to make. But the chevron patterns lends itself to something more crisp looking. So with staple gun in hand I got to work.
 |
| Looks better already |
I draped the fabric over the loveseat back and seat and began cutting. Fortunately, I had just enough fabric. Also, as luck would have it, the loveseat is exactly the width of the fabric (and when I mean exactly, there wasn't even a millimeter to spare!).
Next step, staple.
 |
| The pink fluffy thing below the bass drum is not a cat toy, but my hammer! It was a gift! |
Wow, over three-quarters of the way done in just over an hour. Easy peasy. Next step, arms.
Staple, staple, staple. Don't forget to pull the fabric tight, tuck-in, and secure with spiral fabric pins.
Now it starts to get a bit tricky. I decided to do some piping like the sofa above. Not so difficult, but when you only pull your sewing machine out every couple of years you have to relearn how to use it everytime.
And the fact that the machine has a gazillion stitch options that I will never ever use, it's frustrating to say the least.
Keep smiling. Secure the piping to the arms with upholstery tacks.
Almost done? Not a chance. Aren't the last bits always the hardest? Cut-out and sew on the front arm piece.
Three hours later, I'd finished this one arm. And then I was done. No not done with the sofa, just done. Hopefully I'll have it finished tomorrow, and I'll post some pictures then. See you then.